The legs and glutes are critical to the functioning of the body. When you are walking or moving around, the legs and glutes ensure that you can remain upright. One of the glute’s primary functions is to stabilize the back to prevent damage, pain, and inflammation. Ensuring that you continue to keep your legs and glutes active and possibly increasing these areas’ strength can be incredibly beneficial for the body. The exercises I will list below are exercises I have been competing for the last two years and have been amazing for my body. The fantastic thing about them is these exercises with rubber bands because it lets you work out these essential areas safely. I will explain the exercises using a rubber band, but it is okay to use body weight if you have trouble using a band. I know I always repeat myself, but the vital thing to remember during exercise is to refrain from exhausting yourself.
The Outside created an article named “10 Resistance Band Exercises for Stronger Legs,” which has many exercises that I would like to recommend. For visual representations, you should look at the website. The first exercise is called a lateral band steps. First, place a resistance band around both legs (either between the knees, which is easier, or between the ankles). I then want you to slightly bend your knees and hold yourself in that position for the exercises’ duration. With your feet pointed forward about hip-width apart, use your right foot to step to the right about 12 inches (30.48 centimeters) and return to your original position. You will repeat this approximately ten times and then repeat the movement with your left foot. If you feel up to it, you can perform this exercise for three sets.
The next exercise is standing leg kickbacks. You will place the band around your ankles and stand with your feet hip-width apart for this exercise. Then, engage your core muscles, shift your weight onto one leg, and slowly kick back the other leg as far as you can. You can either return to the original position or tap the ground slightly behind with your foot and kick back once again. In this exercise, you need to focus on balance and form. Make sure your hips do not dip or twist and that your lower back does not arch. Kick back as far as you can without compensating elsewhere. I find it useful to hold onto something to provide balance while I perform this exercise. Performing this exercise for the same amount as the first exercise would be perfect.
The third exercise is called clamshells and is one of my favorite exercises for the glutes. First, place the band slightly above your knees and lie on your side with your knees bent to 90 degrees and stacked on each other. You can place your head on your hands, rest on your biceps, or support yourself with your lower arm (whatever suits you best). Subsequently, engage your core, keep your feet pressed together, and drive your top knee as high as you can without decreasing the quality of your form. Once you complete approximately ten repetitions of this exercise, you will repeat it with the other leg. Performing three sets will make sure your lower body remains active but stop when you feel tired.
The fourth exercise is called runner’s extension. First, lie on your back and loop the band around the center of both feet. Then, lift your feet off the ground so that your knees and hips are bent to a 90-degree angle, and your shins are parallel to the floor. You must keep your feet and knees hip-width apart to maintain tension in your band. Following this, tighten your core and hold one leg firmly in place while you press against the band to fully extend the opposite leg. You will want to flex your feet slightly to prevent the band from sliding off. This exercise’s main point is to hold the “anchor leg” (the one that remains still) as stable as possible. Perform the exercise for the same amount of sets and repetitions as the previous exercise.
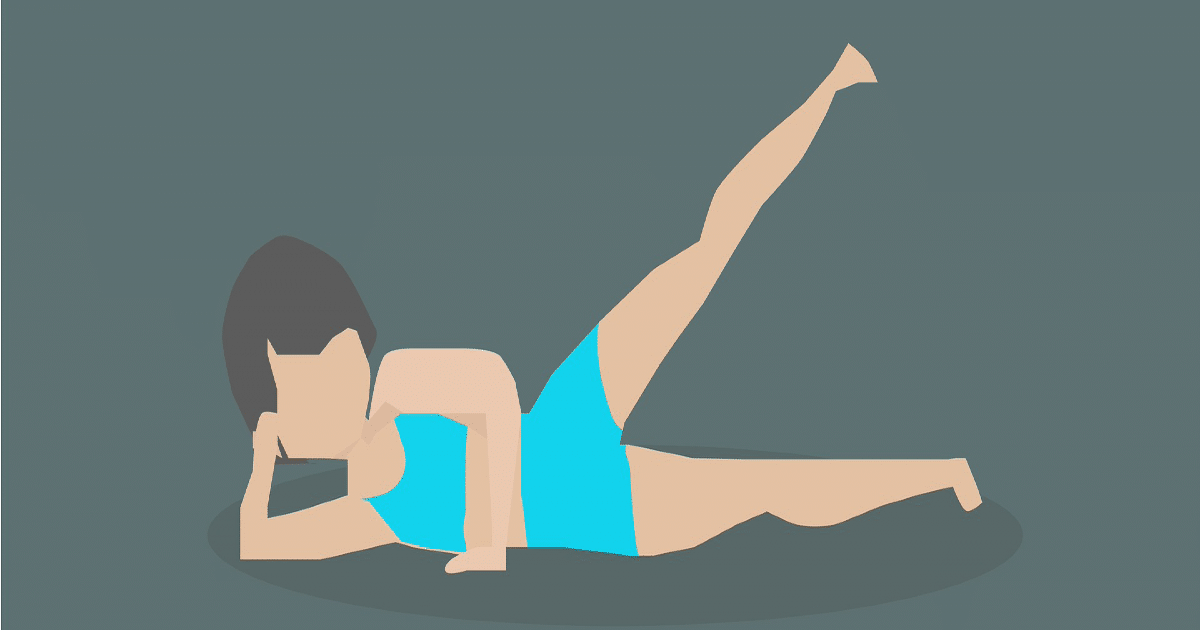
The fifth exercise is a hip bridge or raise that I have discussed previously. The only difference is that the website places a band between the knees. The sixth exercise is a side-lying leg lift (or hip abduction). You should place the band above your knees or around your ankles (ankles being harder than knees). Lie on your side with your legs straight and stacked. Like one of the previous exercises, you can prop your head on your hand, rest it on your biceps, or support yourself with your lower arm. You must then lift your upper leg toward the ceiling as high as possible without harming your form and making sure you keep the leg straight. The first six exercises I discussed are on the Outside website to see how the exercises look.
For the next few exercises, I will be using Self’s “13 Resistance Bands Moves for Workouts You Can Do Anywhere.” The seventh exercise is a banded walk. To begin, loop a band around your ankles and stand with your feet hip-width apart. Then, hold your hands at your chest or place on the hips, slightly bend your knees, keeping your abs and glutes tight. Take ten steps forward and then return to the original, repeating by going backward. Completing ten reps in each direction and three sets should be a good amount for this exercise. I want to emphasize that you should only keep a slight squat and hold the position for the duration of the exercise (stopping if your thighs or body start to feel exhausted),
The eighth exercise is a hip bridge pulse. First, loop a band slightly above your knees around your thighs and lie faceup with your hands at your sides, knees bent, and your feet flat on the floor hip-width apart. Before the exercise, maintain a tight core and glutes as you lift your hip a few inches from the floor. Then, hold the bridge position and push your knees away from each other while your feet remain in the same position. After extending them outwards, slowly return your knees together to revert to the original bridge form (make sure you do not drop to the floor but maintain the bridge position) to complete one rep and repeat this process for ten reps. Like the previous exercises, complete this for three sets.
The ninth exercise is one of the most demanding exercises, so refrain from it if it causes discomfort or you cannot do it. First, you need to loop a mini band slightly above your knees and lie on your back with your hands at your sides, knees bent, and feet flat on the floor hip-width apart. Then, squeeze your clutches and core as you lift your hip a few inches off the floor. Following this, extend your right leg until it’s straight using the other leg with knees still bent to balance yourself. After that, return your right leg to the starting position and then extend your left leg being one rep. Then return to the ground and repeat this process for ten reps and three sets.
The tenth exercise is called fire hydrants. It involves you placing a mini band slightly above your knees and getting in the all-fours position. Your hands should be under your shoulders and knees under your hips. Without shifting your hips, lift your knee out to the side while you tighten your care and prevent your body from rotating as you move your knee. It is essential for you to not compensate by bending your back or moving any other part of the body. After that, slowly return to the starting position and repeat until you reach three reps and ten sets. You can choose to repeat it on the same knee until you reach ten or alternate for the same outcome.
The final exercise is named a donkey kick. Loop a mini band around the bottom of your left foot and right ankle (look at the photo below to understand where to place the band). Start in the all-fours position with your knees under your hips, hands under your shoulders, and core engaged. Keeping your knee bent and left foot flexed, kick your left leg up toward the ceiling and hold for a few seconds if you can. Subsequently, return your left knee to the floor and repeat for a total of ten reps. Do all your reps on one side, then switch to the other until you perform a total of three sets.
These exercises are fantastic in keeping your lower body active and (trying to) strengthen the essential muscles enabling you to walk. These eleven exercises have been with me for the last few years, and I do not doubt that they can help you significantly. With these exercises, my back experiences less pain, I can walk for longer distances, and rarely fall, which explains their significance in my life. I hope that these exercises can help you as much as they have helped me.

